Alerting
Currently, alerts are available for Crash Reporting and Real User Monitoring enabled applications only, with APM alerts coming soon.
Notifications can be received via email, Slack, Microsoft Teams or in other 3rd party applications using webhooks.
The Alerting feature can be accessed via the top navigation or via the “Alerting” link in the left hand sidebar under Crash Reporting and Real User Monitoring.
Any Raygun user can set up alerts to monitor events with specific conditions on their applications and receive notifications when the conditions are met.
note:
The legacy “My Notifications” section has not been replaced by Alerting and all existing notifications will persist.
Alerting operates on a per-plan level, which differs from “My Notifications”, that operates on an individual account level.
Alerts list
The list view shows all alerts that have been set up for those applications you have access to on your plan. So you might see alerts that were set up by a team member and you can subscribe to an existing alert if you want to be notified for them or create your own alerts for yourself or your team.
The alerts list is sorted by the most recently created alert to the oldest created alert. Use the 'Only show alerts I'm subscribed to' toggle to filter the list of alerts to only display those that include you as a recipient for the email notifications.
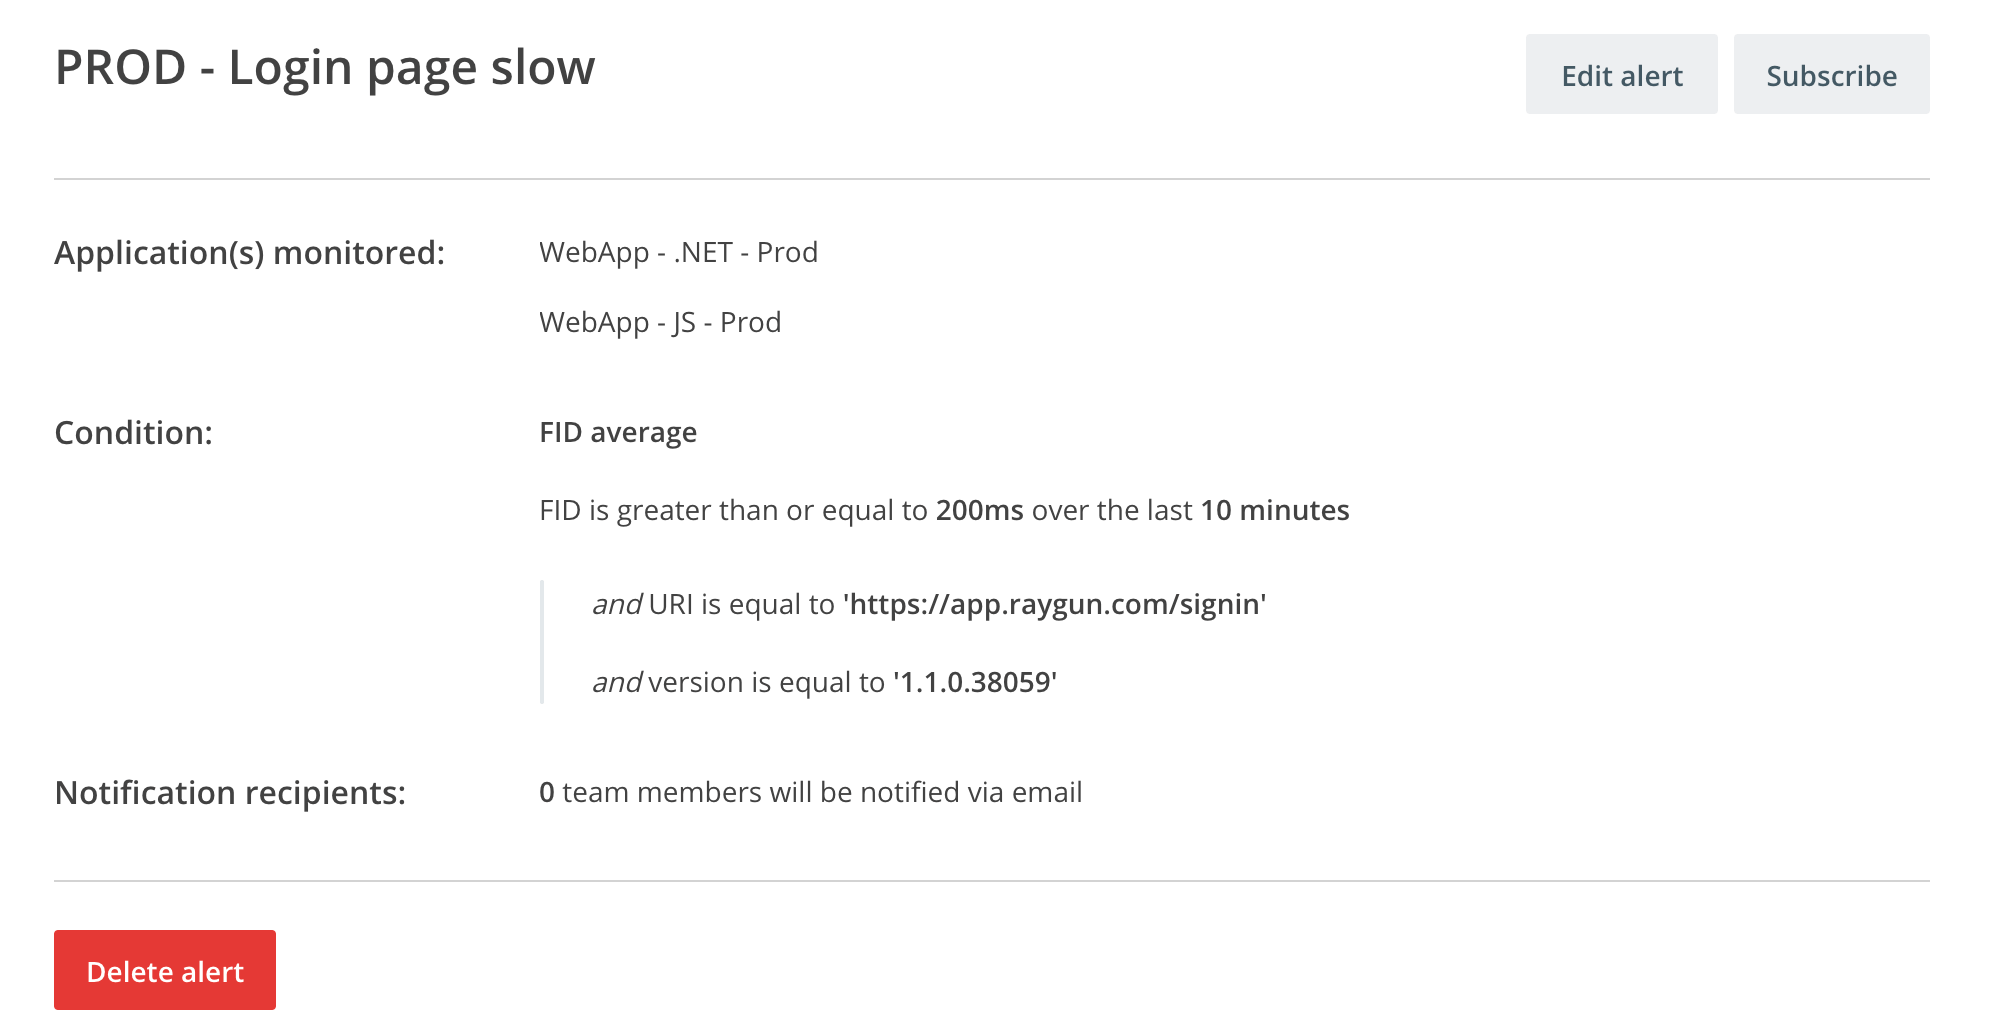
Follow the link on the alert name to see which details are monitored and to edit or delete the alert if you have the right permissions.
Creating alerts
New alerts can be set up from the alerts list following the “Create alert” button on the top right of the page.
In order to avoid duplication and unnecessary email notifications, we recommend checking if there are already existing alerts set up for your requirements or ones that can be extended to suit your needs.
Alert names
You can choose your own alert names in order to work best with your specific requirements. Since alert names will also be used within the email notification subject line, we recommend making them as descriptive as possible to help you identify urgent issues quickly. At the same time, care should be taken to not use sensitive information (application names, customer details etc.) in the alert names so that they won’t get exposed via email.
Alert names have a limit of 60 characters and have to be unique. Accidentally choosing an existing alert name will not override the existing alert but instead result in an error.
tip: A useful alert name might consist of environment, application identifier, alert condition and condition parameters, i.e. [prod] webapp - avg load time > (3s).
Application selection
The application selection dropdown lists all applications that you permission to access and that have either Crash Reporting or Real User Monitoring enabled. It's not necessary to have your applications filled with data received'.
tip: You can set up alerts prior to launching an application to receive alert notifications as soon as data is coming through.
You can create an alert for one or multiple applications at once. Search for specific applications by typing into the dropdown search field.
Alert conditions
Conditions specify for which type of events your selected applications should be monitored. They can be refined further by adding filters.
-
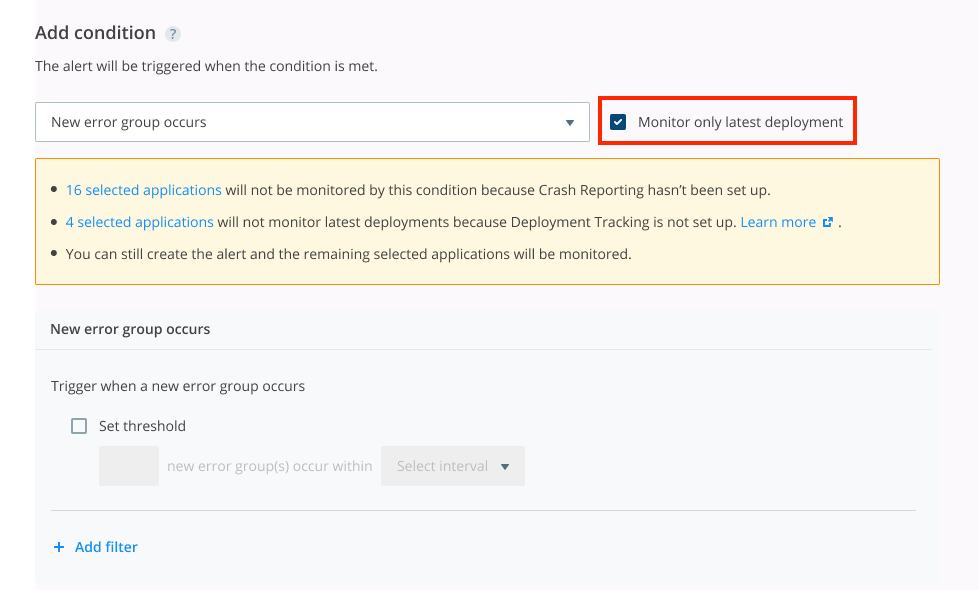
New error group occurs: Receive notifications whenever a new type of error group occurs on your selected applications. You can choose to set a threshold for a number of new error groups within a specific interval to be hit before the alert is triggered. This can be useful to see if recent updates have introduced new errors.
-
Error group reoccurs: Get notified when an instance of an existing error group occurs again. You can choose to set a threshold for a number of error groups in a selected interval before the alert is triggered. Setting this condition alerts you when a fix has not addressed all known errors.
-
Error group occurs: If you want to monitor specific types of error groups, choosing this condition allows you to get notified when a threshold of instances has been hit in a specified interval.
-
Error instance occurs: In order to be notified whenever one or more instances of an error occur within an interval, choose to set up this condition together with filters for specific attributes of the errors or source.
-
Page/XHR performance change: Monitor your RUM enabled applications for changes in page load time, FCP, and Core Web Vitals by setting an aggregation along with a threshold timing or score that will trigger a notification when it hits at least once in your specified interval. You can narrow down the type of traffic to monitor by applying the according filters.
note: To use Alerting for Core Web Vitals metrics, you will need to be on a Team plan or higher. Read about upgrading here.
To be alerted of the latest version, click the ‘Monitor only latest deployment’ checkbox. This will ensure that only events in your most recent deployment will trigger the alert, removing the noise introduced in older releases.
Filters on conditions
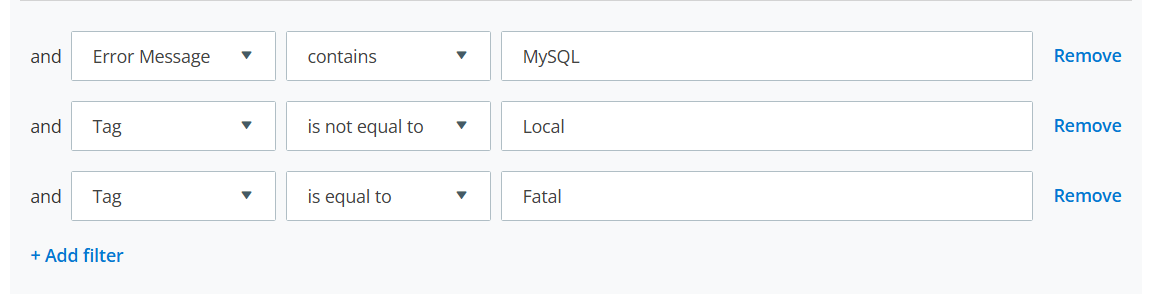
Filters allow further granularity to the alert condition, and multiple filters can be combined to narrow in on very specific events. The available filters depend on the condition you've selected, some are only available for Crash Reporting and some only for RUM enabled applications. Each filter can be set to either include or exclude events that match the specified criteria.
-
Error Message: Enter the full or partial error message to only receive alerts which the message and condition apply to. Please note that the system currently doesn’t support wildcard searches.
-
Tag: Start typing into the text field to get suggestions for custom tags that are already set up for your selected applications. You can also enter new tags if you are planning to use them for applications in the future and want to be notified as soon as an alert is triggered with this new tag. You can combine multiple tags by adding a new filter.
-
Version: Start typing into the text field to get suggestions for deployment versions of your selected applications. You can also enter a future version name or number to be prepared for upcoming releases and be notified as soon as an alert is triggered with this version.
-
Country: Select a country by selecting it from the dropdown or typing it into the dropdown search field. You can not add filters for multiple countries as these would cancel each other out. To monitor events from multiple countries, please create an alert for each country.
-
Platform: To set up alerts for customers from mobile or web devices, select the according platform in the dropdown.
-
Uri: To monitor a specific URL or XHR start typing into the text field to get suggestions for your selected applications, or enter a new Uri for pages you are planning to release and want to receive alerts for in the future.
note:
Combining multiple filters is an AND match, OR matches are not currently supported.
Suggestions for tags and messages are based on data from the last 14 days.
Alert notifications
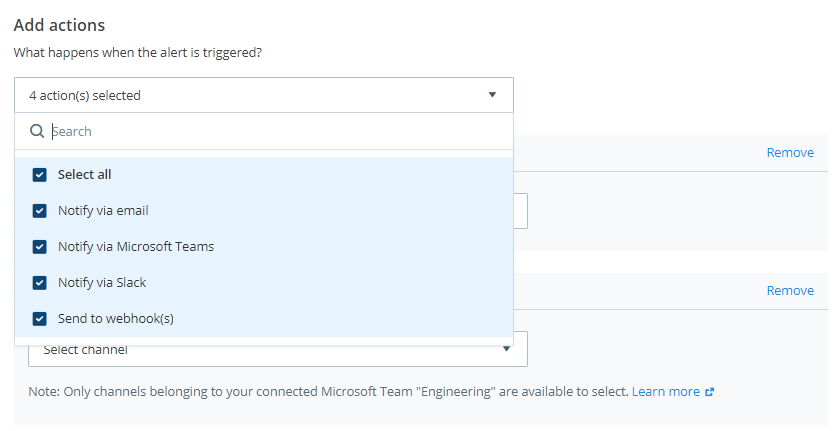
There are currently four methods to receive a notification about an alert - via email, via a webhook, via Slack and via Microsoft Teams to give you flexibility for the alert to be sent to your own system or a third party application.
You can combine all notification mechanisms and send to multiple email recipients, multiple webhooks, Slack and to Microsoft Teams.
Email notifications and recipients
Email notifications are sent out to the list of recipients whenever the conditions are met for one of your selected applications. Note that recipients will only receive notifications when they have access to the application for which the alert is triggered.
You need to have at least one application selected in order to set up recipients because the list of optional recipients are the team members with access to your selected applications.
You can set up alerts for team members by selecting them from the recipients dropdown or searching for them in the dropdown search bar. Recipients will then receive email notifications when the alert is triggered (and they have access to the corresponding application) but they can choose to unsubscribe themselves from the alert should they not want to receive emails.
When you are creating or editing an alert, at least one recipient needs to be selected to receive email notifications; otherwise, the alert will be inactive.
Webhooks for Alerting
note: To use this integration, you will need to be on a Team plan or higher. Read about upgrading here.
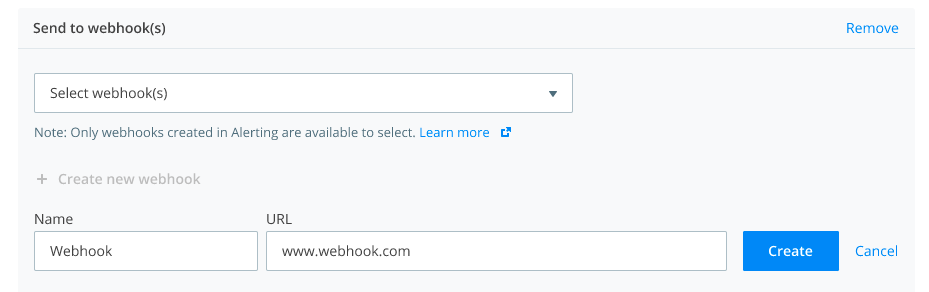
When choosing how to receive an alert notification, you can select an existing webhook on your plan or set up your own. All webhooks previously set up within Alerting will be accessible to everyone on your plan so take care when sharing any sensitive data.
tip: Alerting webhooks are created for the plan so that they can be used by the whole team. Webhooks set up for Crash Reporting applications (which is at a single application level) will continue to work but can not be selected within Alerting as Alerting works for multiple applications on the plan.
To create a new webhook, choose a descriptive name and add the URL endpoint:
Alerts received via webhooks contain the same data as email notifications. You can refer to the payload structure below when selecting which data to pass on to your own system or a third party application:
{
  "EventType": "Alert",
  "Text": "Custom subject line",
  "EventTime": "2022-03-02T01:14:23.0582534Z",
  "Data": {
    "Alert": {
      "Id": "1njsuk5",
      "PlanId": "1njsqoq",
      "Name": "Test webhooks",
      "Conditions": [
        {
          "Type": "ErrorInstanceCount",
          "Interval": "OneMinute",
          "Threshold": 1,
          "Filters": [
            {
              "Type": "ErrorMessage",
              "Comparator": "Contains",
              "Value": "test"
            }
          ]
        }
      ],
      "Targets": [
        {
          "Type": "Applications",
          "Value": "1njsqqw"
        }
      ],
      "Actions": [
        {
          "Type": "Integration",
          "ActionSettings": [
            {
              "Type": "IntegrationId",
              "Value": "1njsuk9"
            }
          ]
        }
      ]
    },
    "Trigger": {
      "ErrorGroups": [
        {
          "Identifier": "zykxt",
          "Name": "Exception: test error",
          "Link": "https://app.raygun.com/crashreporting/1njsqqw/errors/60400001"
        }
      ],
      "ApplicationId": "1njsqqw",
      "ApplicationName": "dev",
      "TriggeredAt": "2022-03-02T01:14:23.0582534Z"
    }
  }
}
note: There is currently no option to change or delete Alerting webhooks. While we are building this functionality please contact us for any urgent issues on webhooks management.
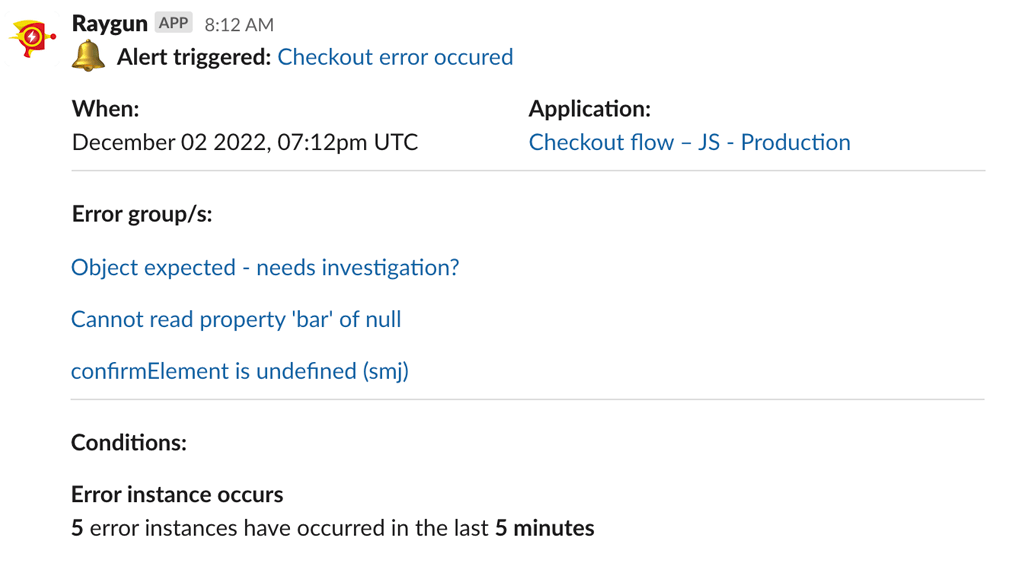
Slack for Alerting
In order to receive alerts in Slack you will need to set up a Slack integration via the 'Plan Integrations' section first before making use of the Slack integration within Alerts. Find detailed information about setting up a plan-level Slack Integration here.
Once you've authenticated the Slack integration onto your plan, you'll now have access to add the 'Notify via Slack' option to your alert. To select the 'Notify via Slack' action within your alert, head to the 'Alerting' screen. From there, create or edit an alert, and under the 'Add actions' section select 'Notify via Slack'. From here you'll be able to select a Slack channel. Once your alert is triggered, you'll receive a notification within the nominated Slack channel.
You can find further information on how to set up Alerts within private Slack channels and managing & deleting the Slack integration within the Slack (Plan-level) section of our documentation.
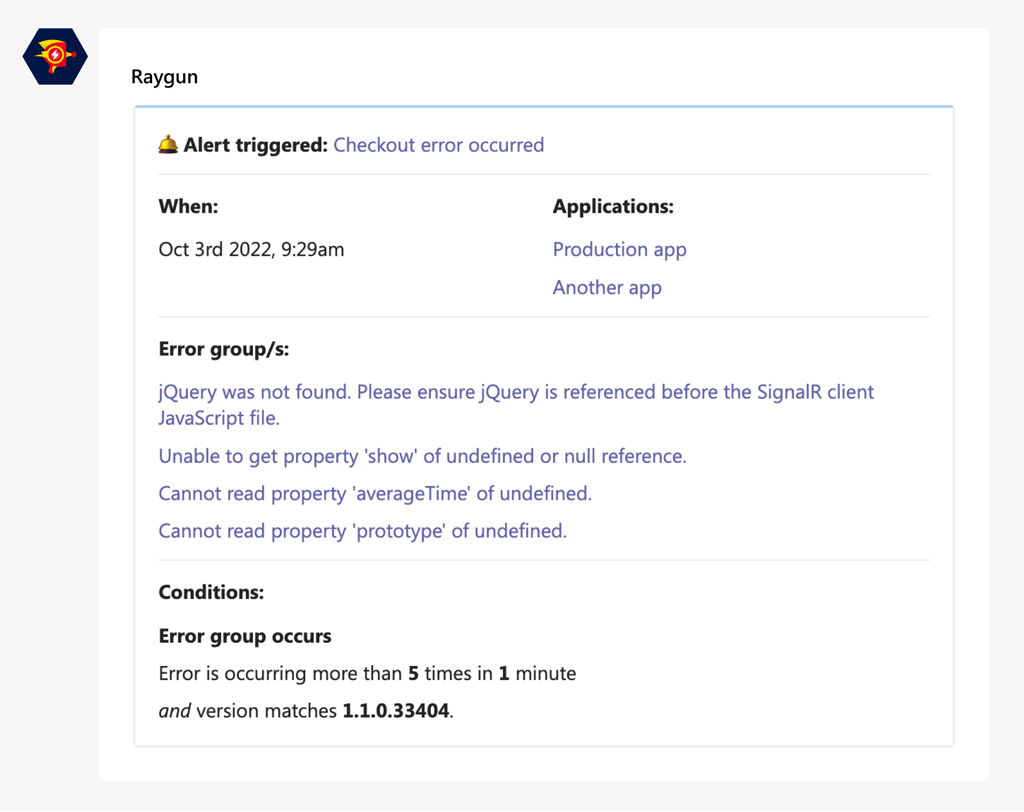
Microsoft Teams for Alerting
In order to receive alerts in Microsoft Teams you will need to set up a Microsoft Teams integration via the 'Plan Integrations' section first before making use of the Microsoft Teams integration within Alerts. Find detailed information about setting up a Microsoft Teams Integration here.
Once you've authenticated the Microsoft Teams integration onto your plan, you'll now have access to add the 'Notify via Microsoft Teams' option to your alert. To select the 'Notify via Microsoft Teams' action within your alert, head to the 'Alerting' screen. From there, create or edit an alert, and under the 'Add actions' section select 'Notify via Microsoft Teams'. From here, you'll be able to select a Microsoft Teams channel. Once your alert is triggered, you'll receive a notification within the nominated Microsoft Teams channel.
Editing and deleting alerts
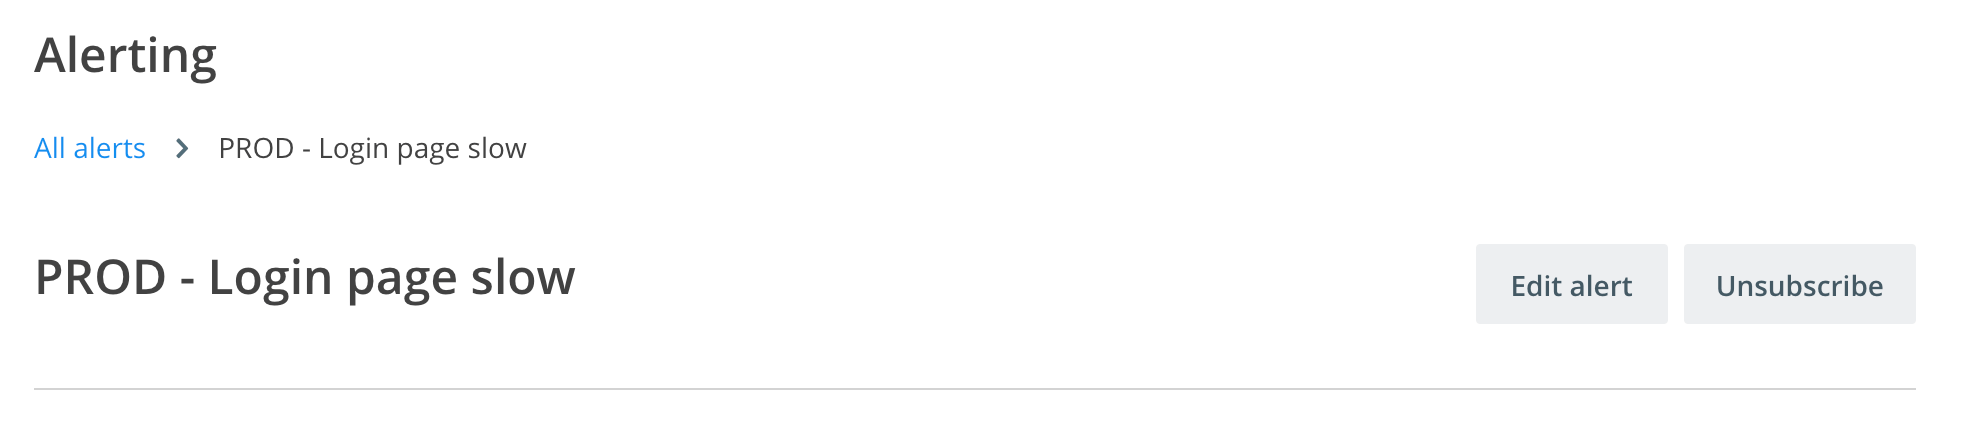
To view details about an alert, you can click on the alert name in the alerts list. This will navigate you to the read-only overview of a single alert. You can view alerts that include applications that you do not have access to in which case only the number of inaccessible applications is listed.
If you have access to all the applications included in the alert, you can choose to edit details on the top right or delete the alert via the button in the bottom right-hand corner. Be aware that these changes will affect anyone listed as a recipient of the alert notifications.
If you do not have access to all the applications included in the alert but you no longer want to receive email notifications then you can select to unsubscribe instead.
All updates made to alerts by any team member are recorded in the audit log.
Subscribing and unsubscribing
Alerts can be set up for multiple members of a team at once. Subscriptions allow each team member to choose for which alerts they want to receive email notifications. You can subscribe or unsubscribe from an alert by opening it from the alerts list and selecting the corresponding action on the top right.
tip: An alert is only actively monitoring your applications when there is at least one recipient subscribed to notifications. Should you be the last remaining subscriber you might want to consider deleting an alert instead of unsubscribing in order to avoid inactive alerts.
Permissions related to Alerting
Alerting adopts the permissions set up for your plan. This means that plan owners have access to all alerts set up by anyone on the plan while visibility is restricted for non-plan owners according to the applications that they have access to.
Have a comment or feedback about Alerting?
We’d love to hear your experience with Raygun Alerting so far, you can submit your feedback or comment to us via the feedback widget on the Alerting pages bottom right corner.