GitHub Enterprise
note: To use this integration, you will need to be on a Team plan or higher. Read about upgrading here.
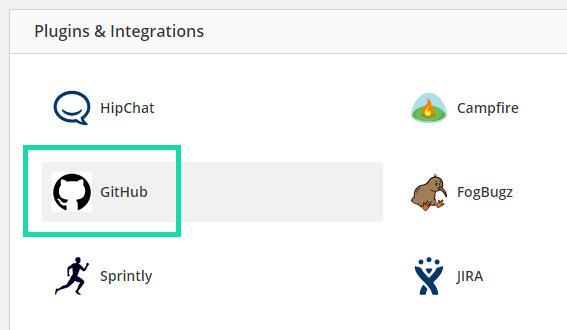
GitHub is a source code hosting and issue tracking service. You can easily connect Raygun error groups to GitHub issues. This integration is even smart enough to resolve a bug in Raygun when you mark an issue as resolved in GitHub and link stacktraces in Raygun error groups back to GitHub.
Setup Instructions
In order to register your GitHub Enterprise account with Raygun you must
first register your application through Github Enterprise by following the steps below:
1. First you must browse to your GitHub Enterprise installation in a browser.
This should be found at an address like http://_**your-domain-name**_/login.
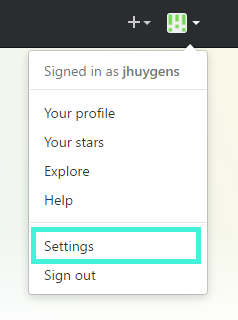
2. Once you are logged in, go to your account settings as shown:
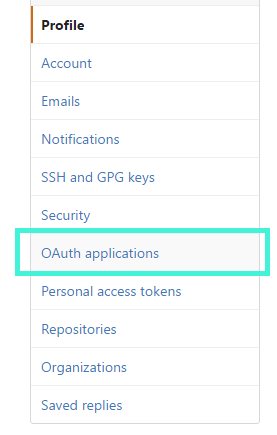
3. From here, go to OAuth applications:
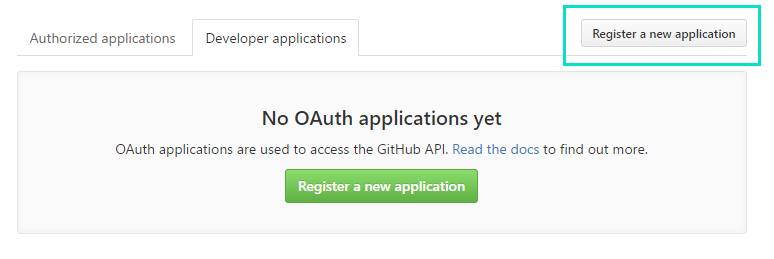
4. Next go to the Developer applications tab.
If you have already registered other applications then they will show up here, otherwise your page should appear as shown.
5. Next click on Register new application.
6. Next you should be presented with the registration form.
Fill out this form with your own applications details.
Name, Homepage and Description are up to you, and will have no affect on how Raygun integrates with Github.
The important part of this form is the Callback URL, which must be set to: https://app.raygun.com/oauth/githubenterprise/callback, as this is the URL we use when authenticating your account with Raygun.
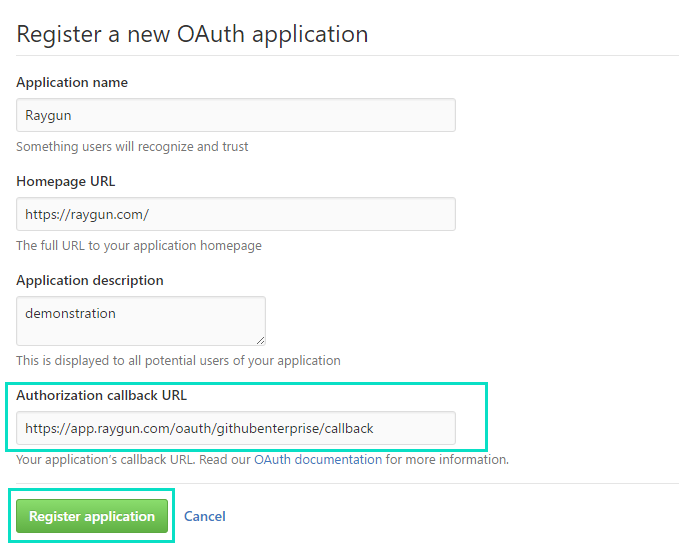
7. Once the form is complete, click Register application.
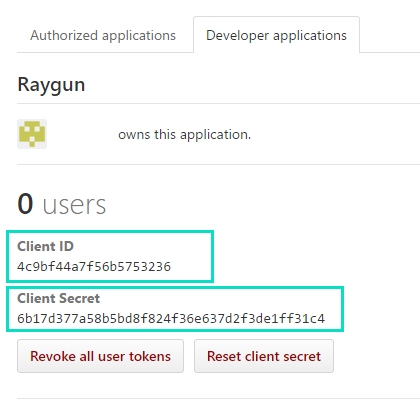
Your should be presented with the page for the new application you've registered.
This page contains the two very important values we need to set up your Github Enterprise integration, the Client ID and Client Secret.
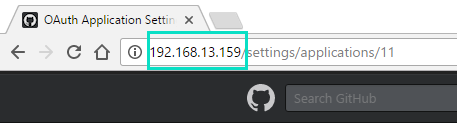
8. The last value you will need is your own Github Enterprise installations URL, which is found in the first part of your browsers address:
This value should be similar to http://_**your-domain-name**_
e.g. http://192.168.13.159 or https://git.buisness.com
9. Once you have your Client ID, Client Secret and your Github Enterprise installations URL you can come back to Raygun and browse to https://app.raygun.com/
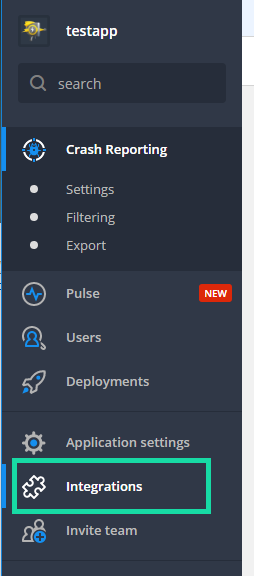
10. From here, click on Integrations then Github.
11. Next click on the Setup tab.
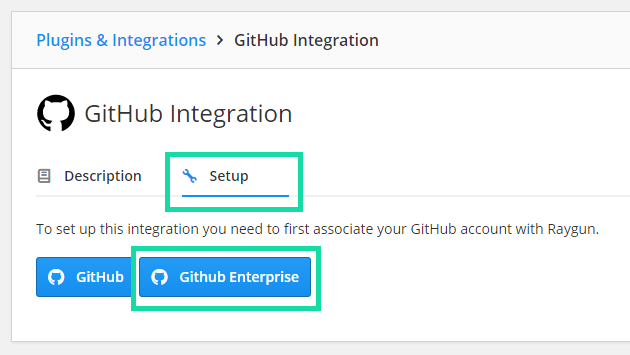
12. You can now click the Github Enterprise button.
13. At this point you will be presented with a form with exactly the same values you found previously.
14. Fill out this form with your Client ID, Client Secret and your Github Enterprise installations URL.
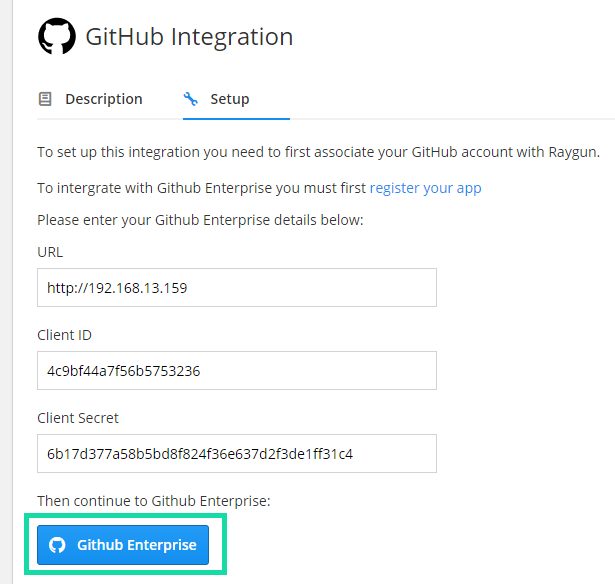
15. Once the form is complete, click the blue Github Enterprise button.
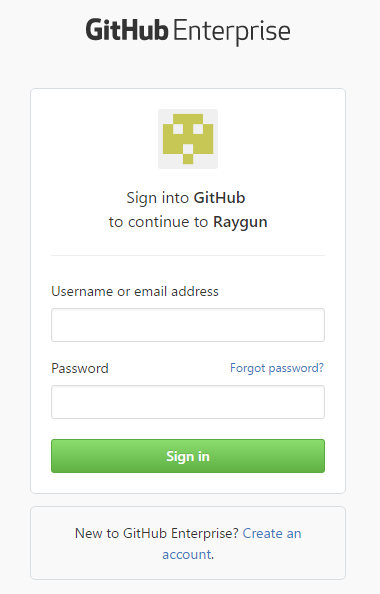
After doing so you should be redirected over to Github Enterprise and asked to login.
Note: if you are already logged in, this step will simply be skipped.
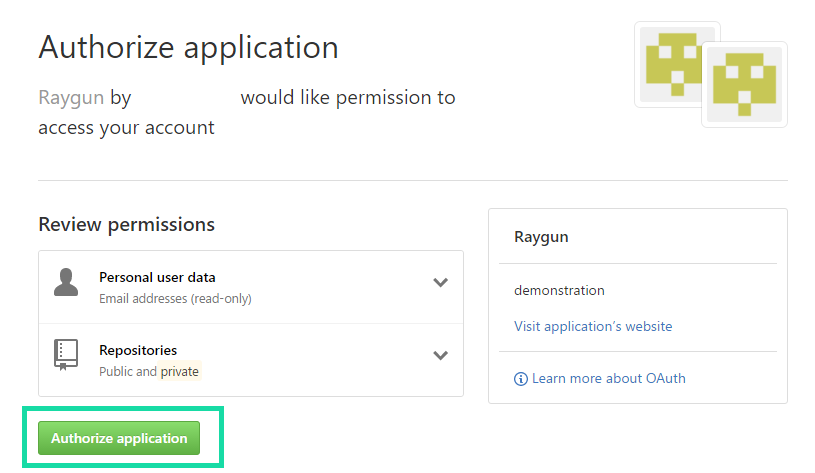
16. Next you should be asked to confirm your apps permissions.
Click the Authorize Application button to continue.
17. After confirming these permissions you will be asked to log in and confirm this new identity back with Raygun.
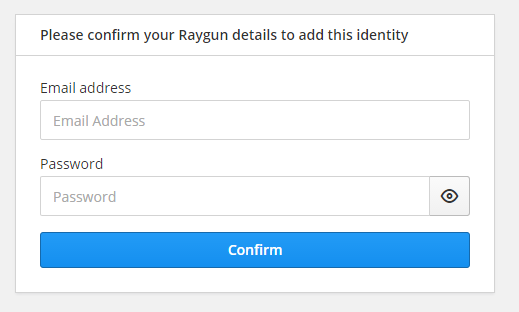
18. After doing so, click Confirm and you should be taken back to the Raygun dashboard if authentication was successfull.
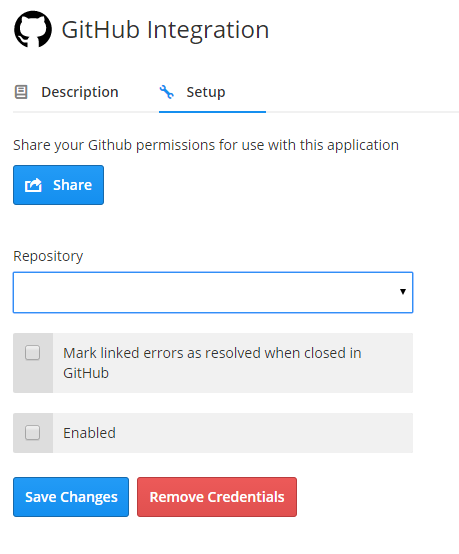
Your Github Enterprise integration is now complete!
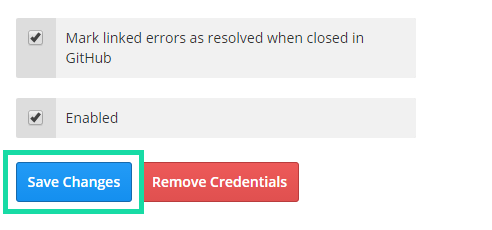
If you wish to use this integration now then tick both Mark linked errors as resolved when closed in GitHub and Enabled.
Then click Save Changes.
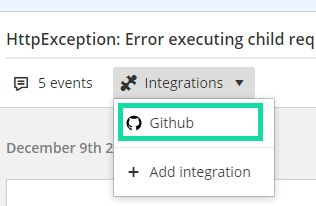
To link an error group with a Github Enterprise issue browse to any error group within Raygun and click on Integrations.
Then choose Github from the drop down list.
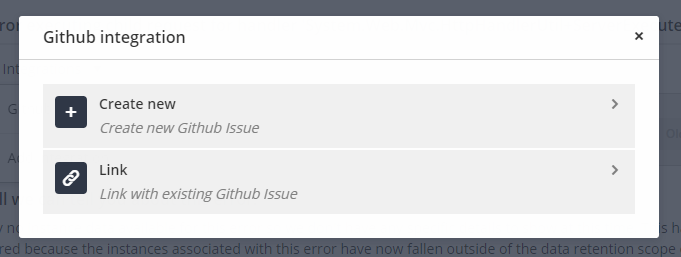
From here you can create a new issue, or link with an issue already on your repository.
Notes:
- If Github does not show up under the Integrations dropdown then it may not be enabled.
Make sure to tick the Enabled checkbox in the integrations setup settings. - If you are left on a 404 (or any incorrect page) after authentication is complete, then your callback URL may be incorrect.
Make sure that your application's callback URL matches that in step 6. - Make sure to include
http://orhttps://at the start of your enterprise URL, as this is required. - If you are left on a Github 404 page right after being re-directed to Github then your client ID and/or secret may be incorrect. make sure these match the values you created back in step 7.