Jira OAuth
note: To use this integration, you will need to be on a Team plan or higher. Read about upgrading here.
This integration will allow you to link a Raygun error group to a new or existing Jira issue.
tip:
If you are using custom fields, please ensure that the fields returned by your Jira instance have the key value set (not null).
Additionally, please use 'In Progress' and 'Done' as your active and resolved JIRA ticket states, respectively. If you don't, we won't be able to activate or check that your tickets are resolved.
Jira OAuth setup instructions
-
Go to "Integrations" and select Jira OAuth.
-
Click the "Setup" tab and follow the onscreen instructions to enter the Raygun link into Jira.
-
You'll be forwarded to Jira to authenticate your account. Follow the onscreen instructions to choose a project and task type for Raygun to use with Jira to complete the setup process.
note: You need an Application Link per Raygun Application setup in Jira
Jira Webhooks setup instructions
-
Login to Jira as project administrator.
-
Click the cog icon next to your avatar and click 'System'. If 'System' is not an option, you will need to request higher JIRA account privileges from an administrator at your organisation.
-
Click on "WebHooks" under the Advanced section.
-
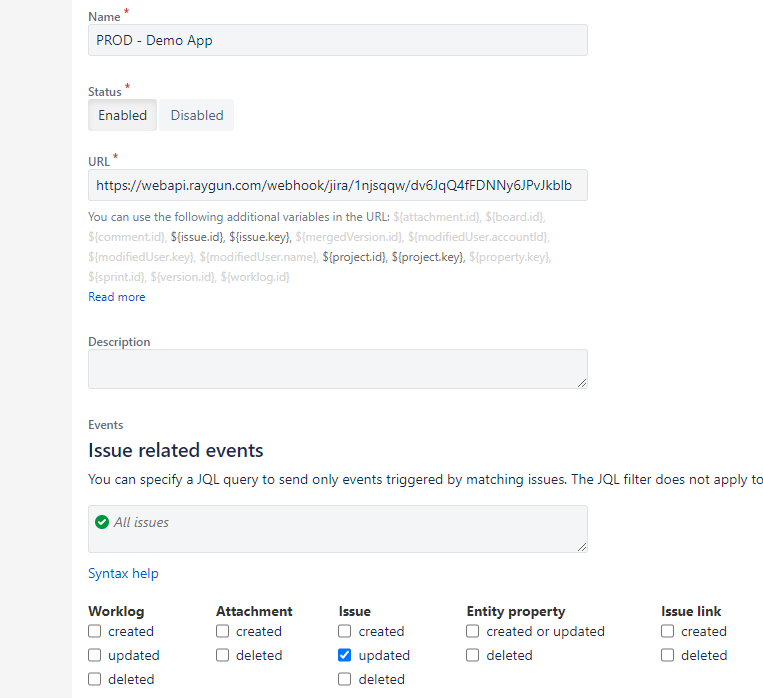
Click on the 'Create a WebHook' button and give your webhook a name.
-
Set the status to 'Enabled'.
-
Enter the 'Jira Webhook URL' from the Raygun Jira Setup tab.
-
Tick the 'updated' checkbox under 'Issue' and save.
Learn more about JIRA webhooks
tip: Need help setting up your Jira integration? Click 'Contact Us' in the sidebar of your application to get in touch with our support team.