Installation
Raygun provides crash reporting and error monitoring for iOS, tvOS & macOS. This provider is written in Objective-C and can be used with both Objective-C and Swift applications.
The provider officially supports:
- iOS 12+
- tvOS 12+
- macOS 12+
Note: raygun4apple may work with earlier OS versions, however we recommend updating to the versions we build and test for to avoid experiencing any unexpected issues.
Step 1 - Install Raygun4Apple
Note: To send exceptions from a test environment, you may need to enable the outgoingConnections flags inside of your XCode project sandbox settings to allow the application to send client requests.
Using the Swift package manager
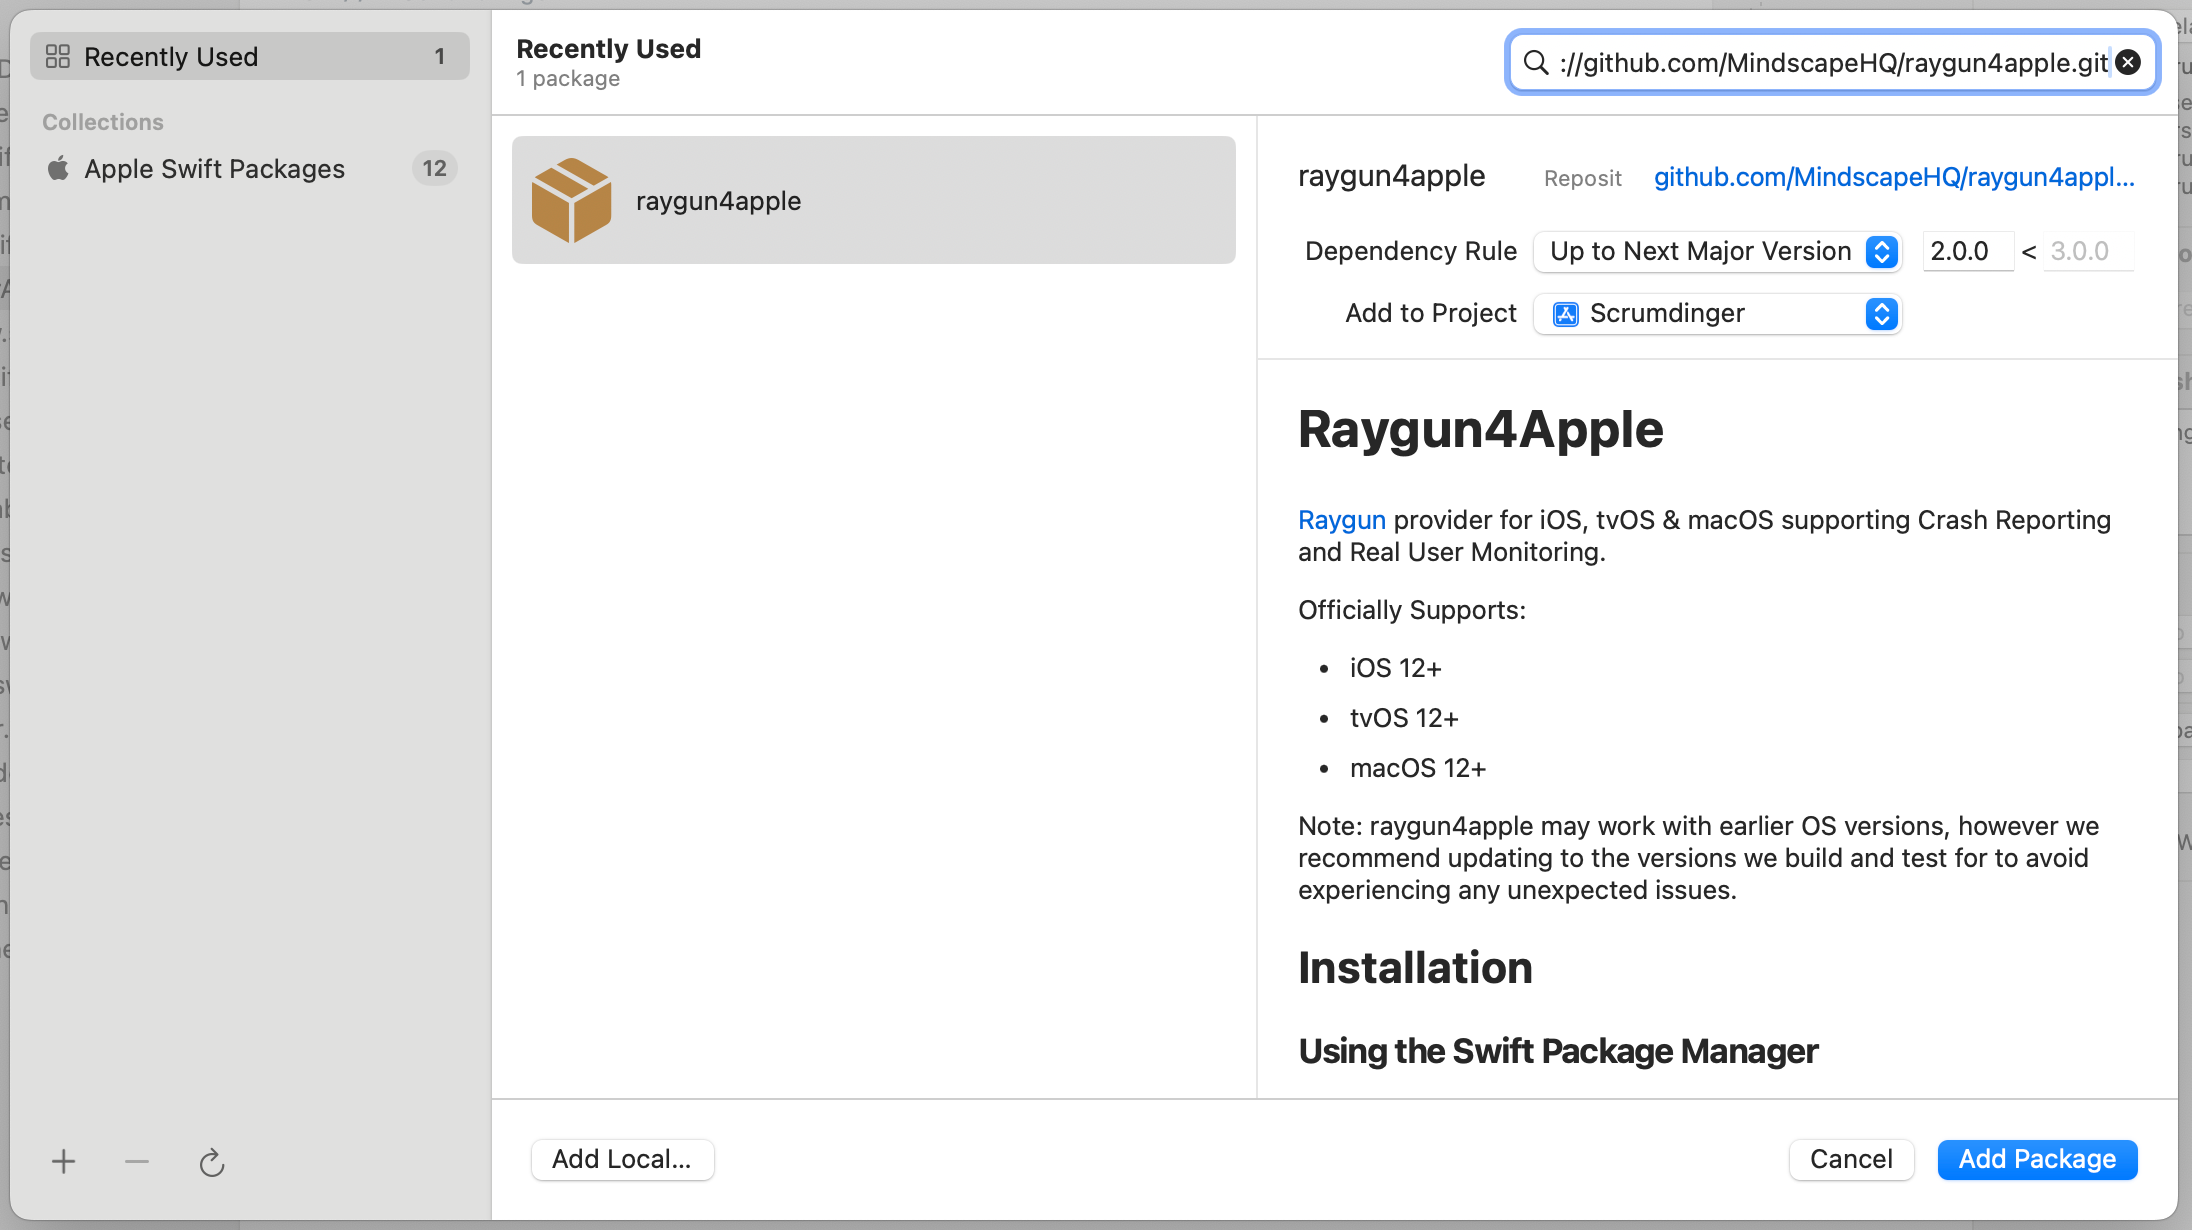
Inside of Xcode, navigate to File -> Add Packages and search for this URL string literal: "https://github.com/MindscapeHQ/raygun4apple.git" and install it. You can see more about the package itself here.

Using CocoaPods
To integrate Raygun using CocoaPods, update your Podfile to include:
pod 'raygun4apple'
Once updated you can run pod install from Terminal.
Using GitHub releases
The latest release can be found here. The frameworks are attached to each release as a zipped file. This can be downloaded, unzipped and included in you project directory.
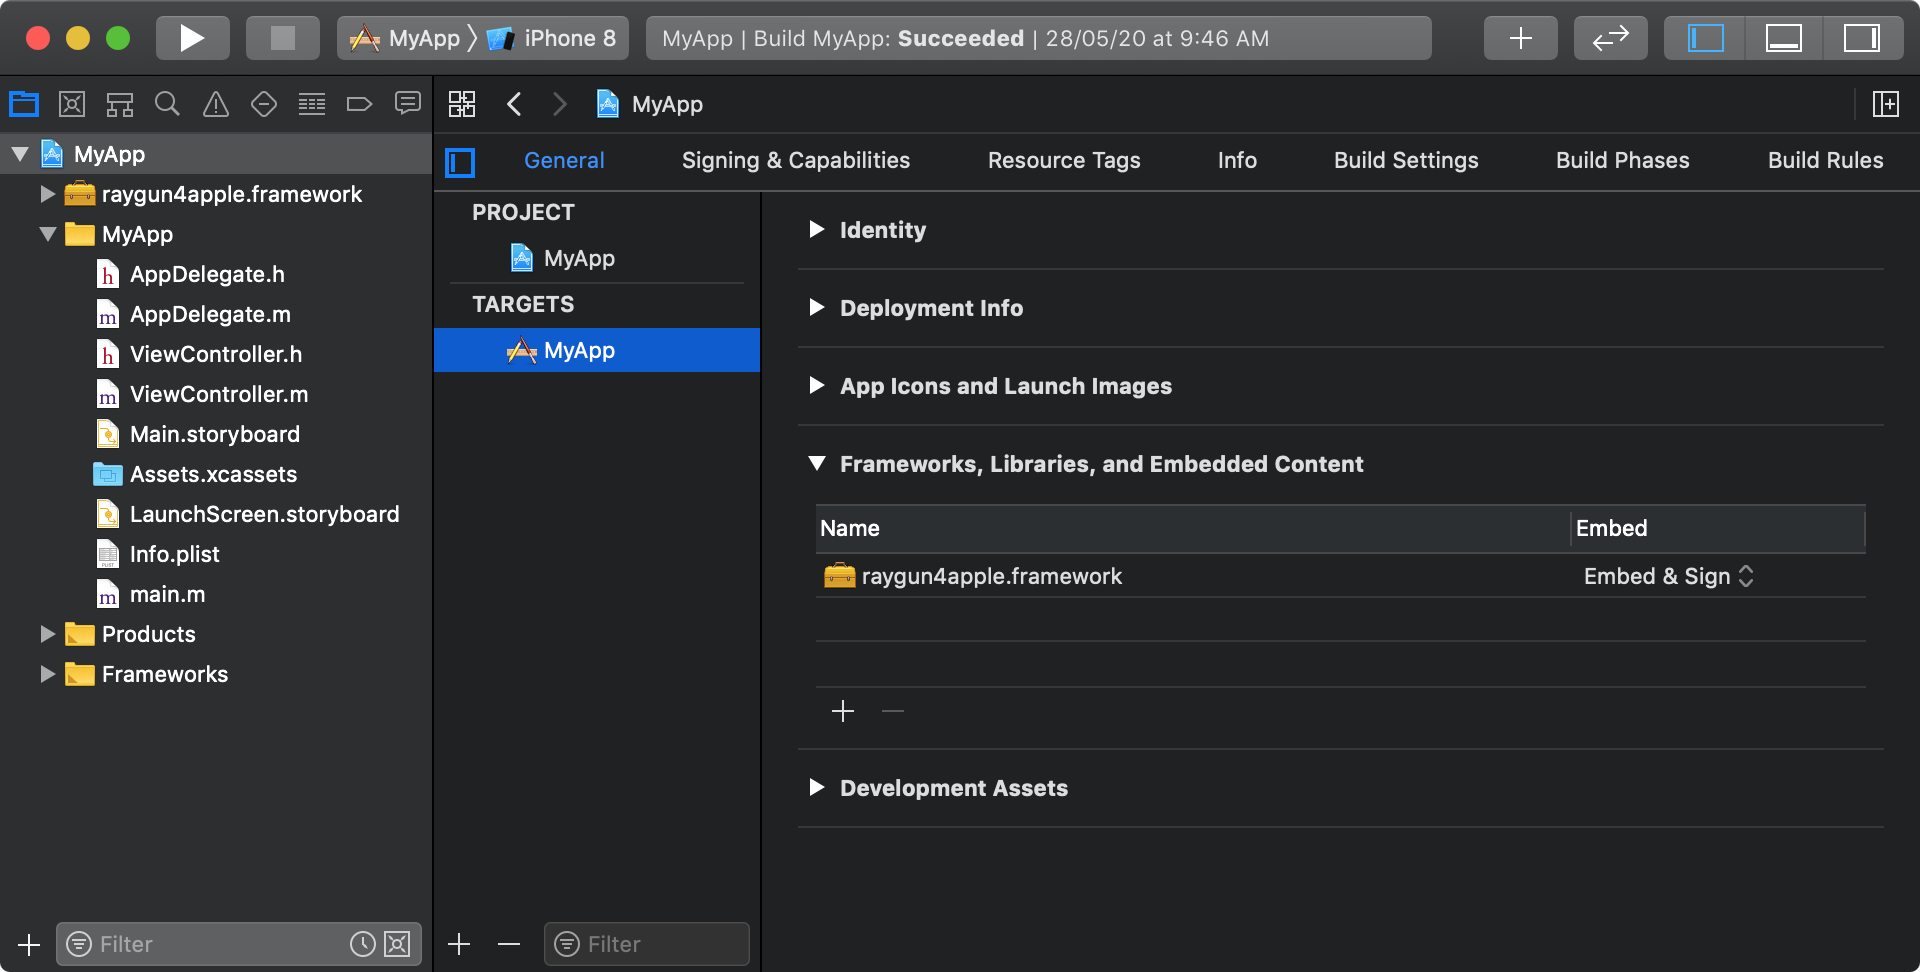
Once included, go to your app's target General settings and add the Raygun4Apple framework to the Frameworks, Libraries, and Embedded Content section. Ensure that the framework is set to Embed & Sign.

Note: The Raygun4Apple provider is developed as a "fat" library, which includes architectures for both simulators and devices. You will need to strip out the simulator architectures (x86_64, i386) before releasing. There is a helpful article on how to do this here.
Step 2 - Configuring the Raygun client
Using the Swift package manager
The configuration step is slightly different if installed via the Swift package manager. Rather than importing the specific header for the target application, simply import raygun4apple.
Here is an example which imports raygun4apple, initializes the provider, and sends a test exception.
// ContentView.swift

import raygun4apple

// ...

struct ContentView: View {

    init() {
        let raygunClient = RaygunClient.sharedInstance(apiKey: "paste_your_api_key_here")
        raygunClient.enableCrashReporting()
        raygunClient.send(exception: NSException.init(name: NSExceptionName.illegalSelectorException, reason: "This is a macOS error!"))
    }
    // ...
}
// ...
In your AppDelegate class file, import the header for your target platform.
Note: For Swift projects you must create an Objective-C bridging header to be able to import the header for your target platform. You can find out how to do this by visiting Apple's documentation for more details.
Using CocoaPods/GitHub releases
For iOS:
#import <raygun4apple/raygun4apple_iOS.h>
For tvOS:
#import <raygun4apple/raygun4apple_tvOS.h>
For macOS:
#import <raygun4apple/raygun4apple_macOS.h>
Initialize the Raygun client by adding the following snippet to your application:didFinishLaunchingWithOptions method:
Objective-C:
RaygunClient *raygunClient = [RaygunClient sharedInstanceWithApiKey:@"paste_your_api_key_here"];
[raygunClient enableCrashReporting];
Swift:
let raygunClient = RaygunClient.sharedInstance(apiKey: "paste_your_api_key_here")
raygunClient.enableCrashReporting()
Your app API key is displayed when you create a new application in your Raygun account, or can be viewed in the application settings.
Step 3 - Release
Deploy Raygun into your production environment for best results, or raise a test exception. Once we detect your first error event, the Raygun app will automatically update.
User tracking
This provider supports tracking the unique users who encounter errors and crashes in your mobile apps.
The identifier property on the RaygunUserInformation class is what separates one user from another. Be sure to set it with something unique, for example a database id, username or email address.
The string properties on a User have a maximum length of 255 characters. Users who have fields that exceed this amount will not be processed.
If the user changes, for instance when logging in or out, be sure to update the user information on the shared Raygun client each time. You can assign user information as described below.
Objective-C:
RaygunUserInformation *userInfo = nil;
userInfo = [[RaygunUserInformation alloc] initWithIdentifier:@"ronald@raygun.com"
                                                  withEmail:@"ronald@raygun.com"
                                               withFullName:@"Ronald Raygun"
                                              withFirstName:@"Ronald"];
RaygunClient.sharedInstance.userInformation = userInfo;
Swift:
let userInformation = RaygunUserInformation(identifier: "ronald@raygun.com", email: "ronald@raygun.com", fullName: "Ronald Raygun", firstName: "Ronald")
RaygunClient.sharedInstance().userInformation = userInformation
Advanced Setup
For advanced setup information, please refer to the Advanced Setup page.
The provider is open source and available at the Raygun4Apple repository.