Use Raygun to report errors in your Swift apps
Posted Nov 6, 2014 | 5 min. (1031 words)Swift is a new language created by Apple for writing iOS and OSX applications. Swift features automatic memory management, an easy to use syntax, compiles to high-performance native code and has interoperability with Objective-C APIs.
This tutorial will show you how to create a new Swift application, how to include and call Objective-C code from Swift code and how to integrate Raygun into the application. Raygun is an error reporting service that will give you awareness into the health of your published applications. If you already have a Swift application that you’d like to use Raygun in, you can skip all the way down to the “Integrating Raygun” section below.
Create a Swift application
Open up XCode 6 and create a new Project. The application in this tutorial is just going to crash at the press of a button, so I have gone with the “Single View Application” template.

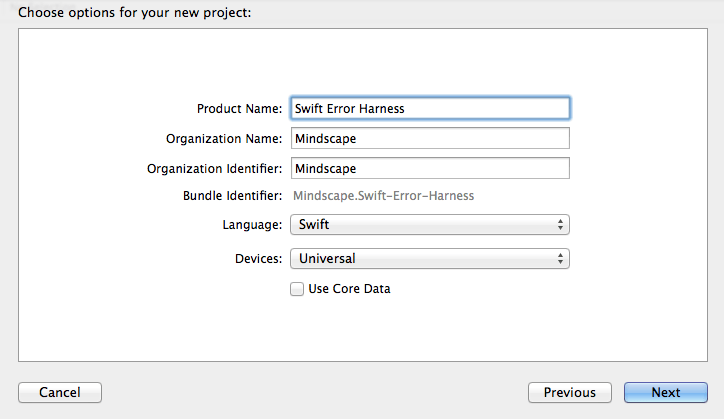
Press Next to see a form where you select some options for the application. Enter a name, and then make sure the Language is set to Swift.

Add some buggy code
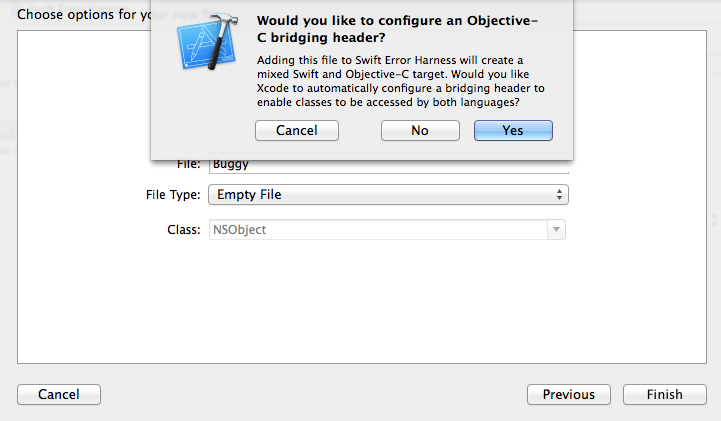
Now we need to add some code that will demonstrate a crash. This is a good opportunity to show you how Swift and Objective-C code can be used together, so lets write the buggy code in Objective-C and call it from Swift code. In XCode, right click the application folder and select “New File…”. In the panel that opens, select the “Objective-C File” template. In the next form, give the file a name (I’ve called it Buggy) and press Next. After doing this, you’ll see a message that you’ve probably never seen before:

An Objective-C bridging header is a .h file where you can import Objective-C headers. Any headers that you import into the bridging header can be used in any swift code in your application. Go ahead and click “Yes” on the message popup.
Now, add an Objective-C Header file to go with the implementation file you just added. In this header file, add a single function definition as follows:
#ifndef Swift_Error_Harness_Buggy_h
#define Swift_Error_Harness_Buggy_h

@interface Buggy : NSObject

+ (void)crash;

@end

#endif
In the implementation, write any code you want that causes an app crash. Here I simply call an invalid selector:
#import <Foundation/Foundation.h>
#import "Buggy.h"

@implementation Buggy

+ (void)crash{
    [self performSelector:sel_getUid("Garbage")];
}

@end
Now, as mentioned previously, you’ll need to import Buggy.h into the bridging header so that you can call it from swift code. You’ll also need to import Foundation.h to get the NSObject class that Buggy extends. Here is how this looks in the bridging header:
#import <Foundation/Foundation.h>
#import "Buggy.h"
Add UI to call the buggy code
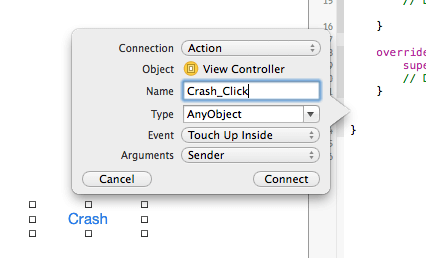
To finish off the demo application, open Main.storyboard and add a button. Next open the Assistant editor by clicking the tuxedo icon near the top right corner of XCode. This will cause ViewController.swift to open up beside the Main.storyboard UI editor. Select the button you added, then Hold down the control key and drag the mouse from the button to the ViewController.swift code. This will cause a little popup to appear. Change the Connection to Action, give it a name and click “Connect”.

In the action code that appears (which is written in Swift) call the Objective-C Buggy code:
@IBAction func Crash_Click(sender: AnyObject) {
    [Buggy .crash()];
}
Running the application now and clicking the button will cause the app to crash as expected. That leaves one last thing to do…
Integrating Raygun
By integrating Raygun into your application, crash reports will be sent to your Raygun account where you and your team can view the error information and work on solving the bug. This is especially valuable when your application has been published – so you don’t have to worry about whether or not your customers have told you about all the exceptions that have occurred.
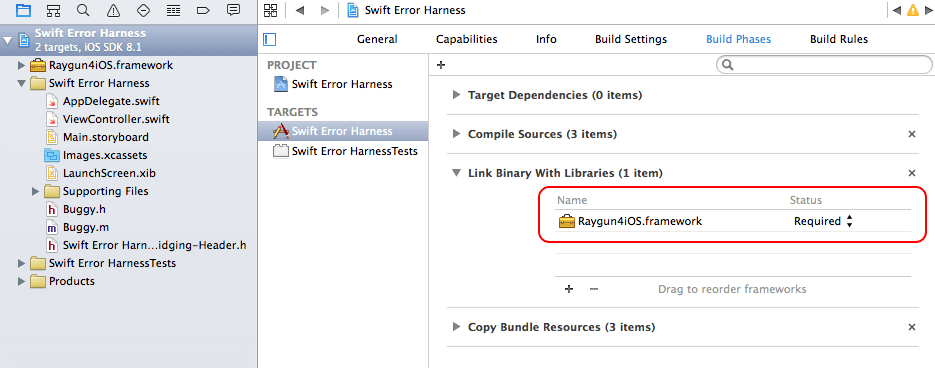
There are 2 ways to add Raygun to your project: use CocoaPods (a dependency manager) by following the instructions here, or manually download and reference the framework. To reference this in your Swift application, click the project in XCode, then select “Build Phases”, open the “Link Binary With Libraries” section and then drag the Raygun4iOS.framework into the list.

Since Raygun4iOS is an Objective-C framework, add the following import to your bridging file so that you can call it from Swift code:
#import <Raygun4iOS/Raygun4iOS.h>
Finally, in AppDelegate.swift, add the following code to the application function. Your app API key can be obtained when you create a new application in your Raygun account, or view the Application Settings of an existing application.
[Raygun .sharedReporterWithApiKey("YOUR_APP_API_KEY")]
And that’s all it takes to integrate Raygun into a Swift app!
Now run the application to deploy it to either the simulator or a device. Please note that if the app crashes while the debugger is attached, XCode probably won’t let execution to continue which will prevent Raygun from seeing it, so it’s best to stop the XCode debugger after deploying. Start the app, and then press the button which will crash and close down the application. At the time the application crashes, the application will be in an unpredictable state, so Raygun4iOS safely saves the error report rather than sending it straight away. Open the application one last time to cause the saved error report to be sent to your Raygun account.
Upload dSYMs with the Raygun Sidekick
If you are familiar with iOS crash reporting, you’ll know that symbolicating a crash report with a dSYM will produce a far more useful stack trace. Your Raygun account can take care of symbolicating all your iOS crash reports if you upload the appropriate dSYM to your Raygun account. The most convenient way to do this which we recommend is to use the Raygun Sidekick Mac tool. Read more about this here!
Try Raygun in your Swift apps today
If you have any question about Raygun, we’d love to hear them in the comment section below, or in the forums. If you want to learn more about working with Swift, you can find various resources here.
Like the sound of getting awareness into how healthy your published applications are? Sign up for a free Raygun trial now – No credit card required.