Using Raygun with Google Tag Manager
Posted Oct 4, 2018 | 6 min. (1106 words)If you want find out if end users are running into bugs, slow page load speeds and other hidden issues, or want to discover where and why people are falling out of your conversion funnels, Raygun is going to provide much needed visibility and answers for your team.
Raygun can be integrated into your applications in various ways, from adding the code directly into your app (which only takes a few minutes), to downloading the full source. One easy method, especially if you only want Raygun to be present within certain parts of your application, is by utilising Google Tag Manager (GTM).
Here I’ll show you how to set this up to monitor your application / website’s front end page load speeds, plus any errors and crashes affecting your customers in just a few minutes.
Of course, you’ll be needing a Raygun account to make use of this functionality.
Setting up Google Tag Manager
If you’re new to Google Tag Manager (GTM) you might need to get your head around how it works first. Although there are a heap of tutorials already available, and we don’t need to cover it all in depth in this tutorial, here are some basics for how to get started with GTM.
Adding the GTM script
If you’re new to using Google Tag Manager, the GTM container will basically load everything you put inside of it when a user loads the page, and fire scripts and actions you control based on the trigger rules you set up in the Google Tag Manager interface.
After signing up for a GTM account you need to take the container code GTM provides and add this into your code. The latest GTM scripts require you to add one script as high in the
of the page as possible:(function(w,d,s,l,i){w[l]=w[l]||[];w[l].push({'gtm.start':
new Date().getTime(),event:'gtm.js'});var f=d.getElementsByTagName(s)[0],
j=d.createElement(s),dl=l!='dataLayer'?'&l='+l:'';j.async=true;j.src=
'https://www.googletagmanager.com/gtm.js?id='+i+dl;f.parentNode.insertBefore(j,f);
})(window,document,'script','dataLayer','YOUR_CONTAINER_ID');Additionally, paste this code immediately after the opening
tag:<noscript><iframe src="https://www.googletagmanager.com/ns.html?id=YOUR_CONTAINER_ID"
height="0" width="0" style="display:none;visibility:hidden"></iframe></noscript>Obviously taking this from your own GTM account with your container ID, and deploy to your app.
Tags
Tags are set up to complete a specific task like adding conversion pixels and scripts. When published, these will be placed inside the container when they are ’triggered’ by a trigger. There are all sorts of different types of tags you can use inside GTM, but for the basic set up of Raygun we can use a Custom HTML tag.
Triggers
A trigger is a firing mechanism which will load the tag within the container when rules are hit. If for example we had the Raygun script as a ’tag’ and we wanted it to fire on only our homepage, then we would add a trigger with a rule of page view > url equals > https://raygun.com/.
Triggers depend on you telling GTM the rules in which you want it to fire. You then add your tag, to your trigger.
Triggers can also fire multiple tags. Generally we want to fire minimum tags on a page, but it’s really up to you what you need to fire, and where.
Variables
These are used in advanced settings. You can specify a variable to be used in various tags. For example you might add several domains into a variable and then in a tag, just call {domains}.
Adding Raygun with Google Tag Manager
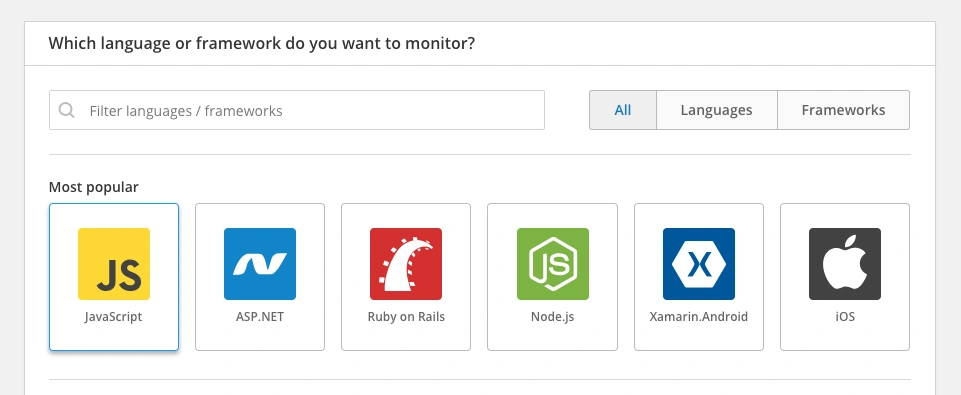
In the Raygun setup screens, create a new application and then choose JavaScript as the language you wish to monitor.
You’ll then need to add the Raygun scripts into Google Tag Manager.
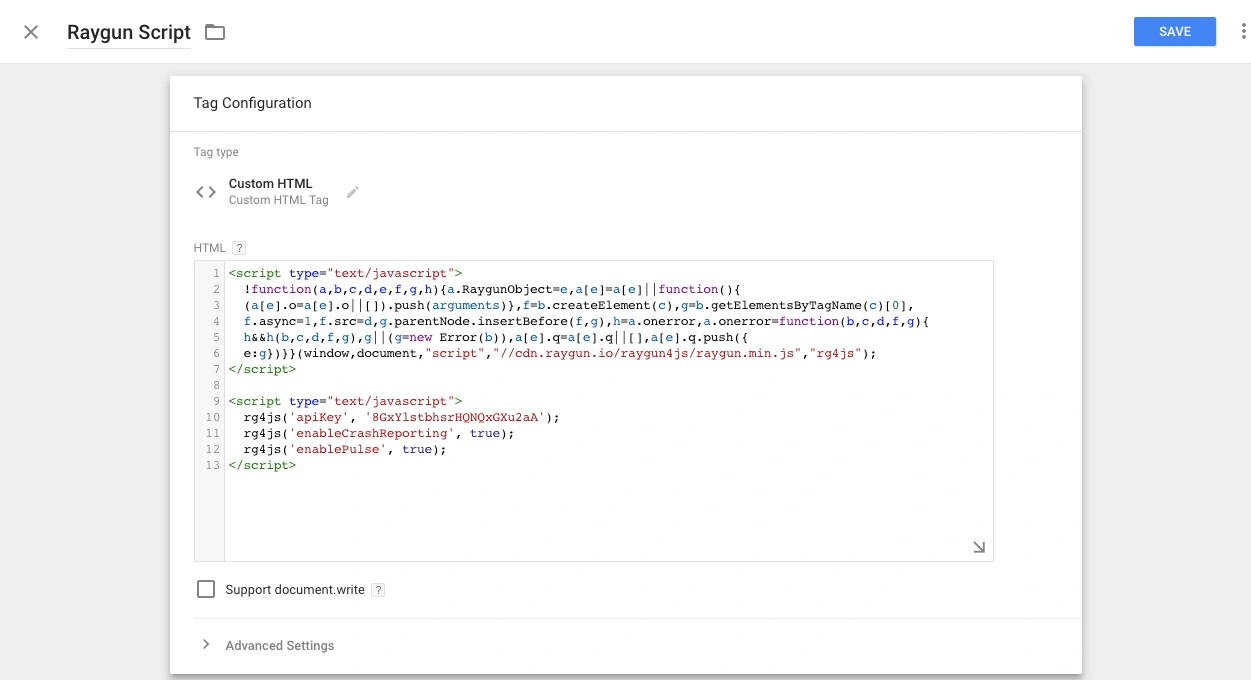
First of all we need to create a new tag. In Google Tag Manager, click to create a new tag and call it something like “Raygun Script”.
Next go back to Raygun and grab the JavaScript code snippets, along with your included API key, into the GTM tag like below.
Troubleshooting API key issues
Now we’ll need a trigger to fire our tag
You can use one of your exisiting triggers of course if it matches what you need. Adding this trigger we will be making our Raygun script fire on the rules we have selected. By default we should set this to trigger on all page views, but you could create your own customised trigger if you needed it to fire only on specific pages, or already have this functionality set up.
Preview
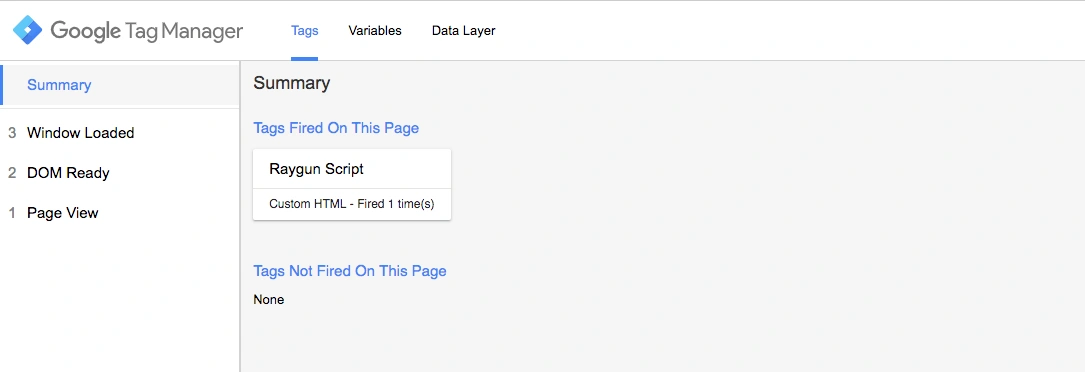
Preview the tag by clicking on the preview button in Google Tag Manager and then navigating to your website / app.
Here you’ll see whether the tag is firing and be able to debug it if it’s not working.
Publish the changes to your GTM container.
It really is that simple
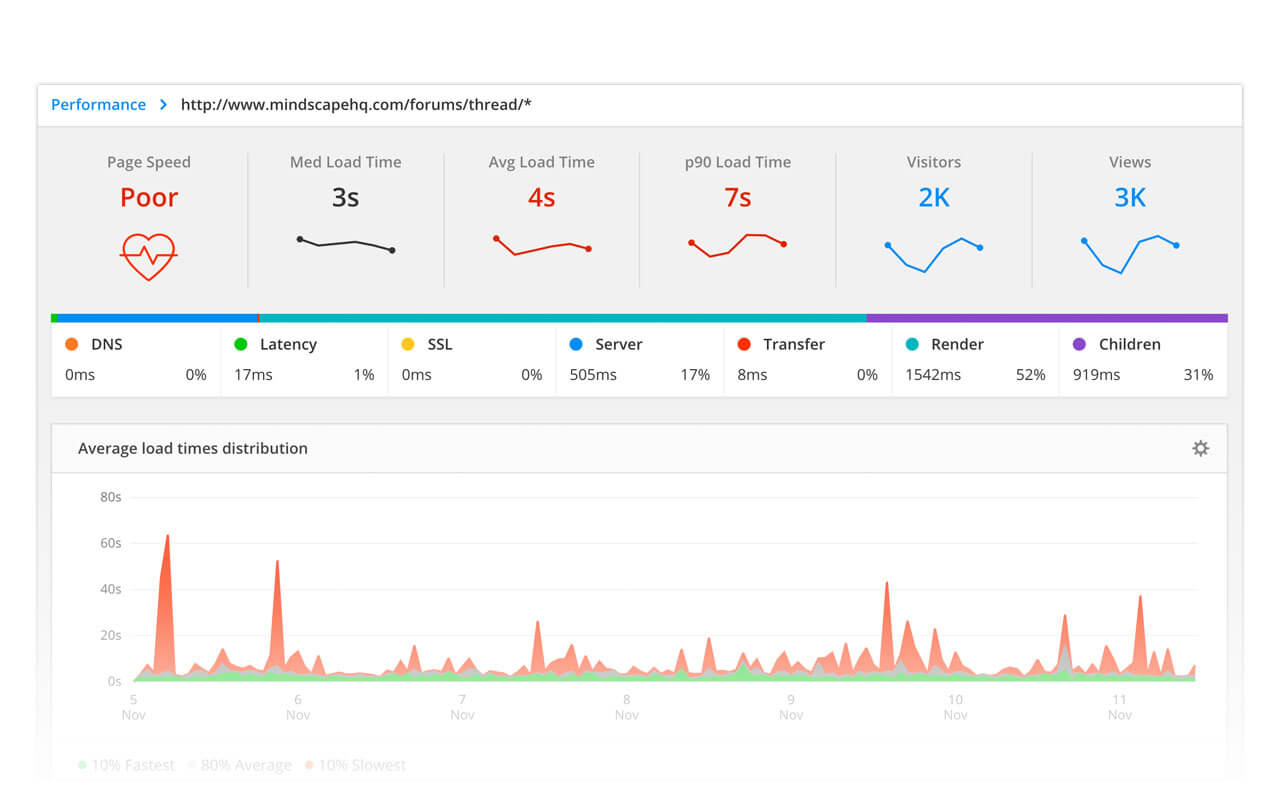
You’ll now get complete visibility on the end user experience customers are having when interacting with your website and/or application.
Page performance information via Real User Monitoring will appear showing users and their locations immediately. Click the Performance tab to dig into diagnistic details on poor page load speeds - Including individual assets causing slow page loads, location latency, performance by browser, OS and full user session histories.
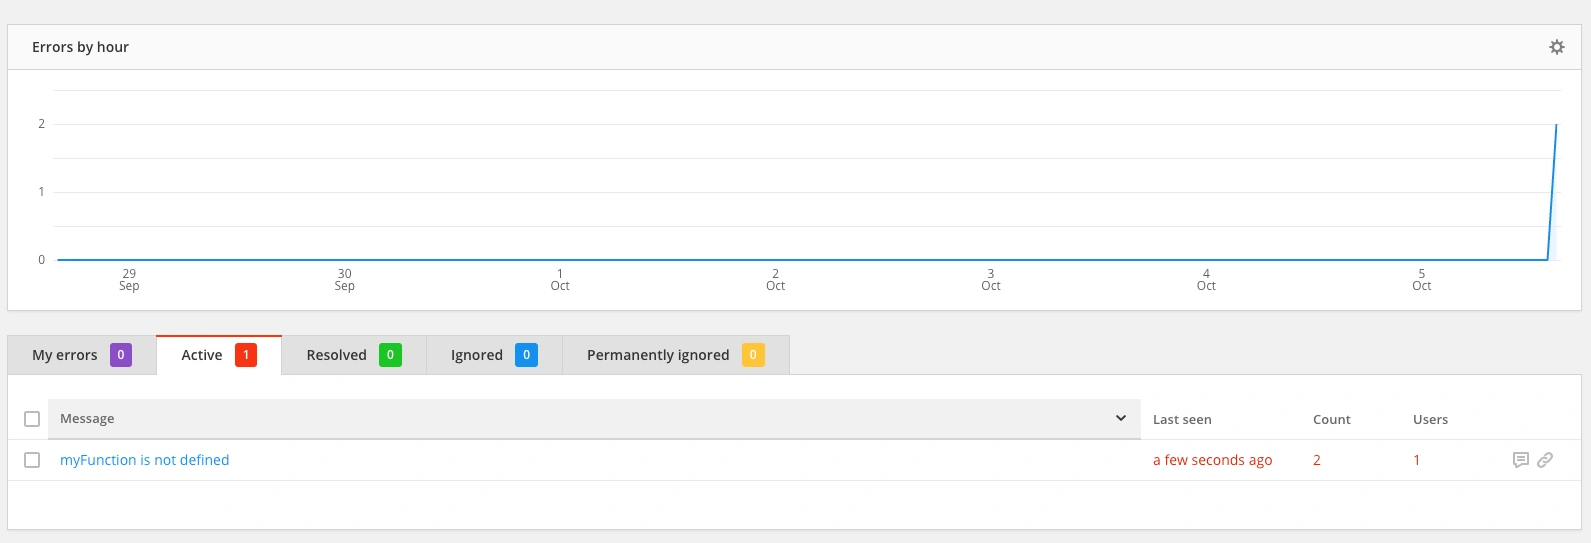
Crash Reporting if enabled will also start to show unhandled exceptions and crashes affecting users, with diagnostic details just a click away. Allowing developers to resolve them with greater speed and accuracy than using logs and incomplete information from users. Note that this information will only appear once an error has been detected by Raygun.
Add user data
To set up the library to transmit data for the currently logged-in user, add the following lines of JS code inside the end of the script block from the previous step. It’ll end up looking something like this:
  rg4js('apiKey', 'YOUR API KEY');
  rg4js('enableCrashReporting', true);
  rg4js('enablePulse', true);
  rg4js('setUser', {
  identifier: 'users_email_address_or_unique_id',
  isAnonymous: false,
  email: 'users_email_address@domain.com',
  firstName: 'Firstname',
  fullName: 'Firstname Lastname'
});
Single Page Applications
You can track SPA view changes with the trackEvent function:
rg4js('trackEvent', { type: 'pageView', path: foo });For more examples on how to use the trackEvent function, see the Single Page Application documentation.
It’s super easy to get setup with Raygun regardless (literally a few minutes), but Google Tag Manager provides another quick option for adding the Raygun scripts into your application.
Do let us know if you have any feedback!